
Introduction:
This article provides a complete guide on implementing file upload and download functionality in an ASP.NET Core MVC application hosted on Windows Hosting. The process involves creating a new project, modifying the view to include file upload controls, and implementing the necessary controller actions. By following these steps, users will be able to easily upload and download files through the ASP.NET Core MVC application.
File Upload and Download in ASP.NET Core MVC:
Step 1: Creating the Project
To begin, create a new project using the ASP.NET Core Web application template, selecting the model view controller option.
Step 2: Modifying the View
In the Index.cshtml file, integrate the code snippet below to include file upload controls and buttons. Ensure the use of the correct form attributes to enable proper file submission. Additionally, a success message div is incorporated to notify users of successful uploads.
<!-- In order to post files to the server we should use form with post method, also need to add multipart/form-data encoding.
	 Otherwise the files will not be sent to the server. -->
<form method="post" enctype="multipart/form-data">
	<input type="file" name="files" multiple />
	<button type="submit">Upload</button>
</form>

<!-- To show the success message to the user  -->
@if (ViewBag.Message != null)
{
	<div class="alert alert-success" style="margin-top:50px">
		@ViewBag.Message
	</div>
}
Step 3: Displaying Uploaded Files
To display uploaded files or existing file lists on the screen, add the given code snippet in the Index.cshtml file.
<p style="margin-top: 50px">List of Files</p>
<!-- Get all the files from the server -->
<ul>
	@foreach (var item in Model.Files)
	{
		<li>
			<a asp-action="Download"
			   asp-route-filename="@item.Name">
				@item.Name
			</a>
		</li>
	}
</ul>
Step 4: Uploading Files
Add a HomeController.cs and action method to upload files to the server.
[HttpPost]
public IActionResult Index(IFormFile[] files)
{
	// Iterate each file
	foreach (var file in files)
	{
		// Get the file name from the browser
		var fileName = System.IO.Path.GetFileName(file.FileName);

		// Get the file path to be uploaded
		var filePath = Path.Combine(Directory.GetCurrentDirectory(), "upload", fileName);

		// Check if a file with the same name exists and delete it
		if (System.IO.File.Exists(filePath))
		{
			System.IO.File.Delete(filePath);
		}

		// Create a new local file and copy contents of the uploaded file
		using (var localFile = System.IO.File.OpenWrite(filePath))
		using (var uploadedFile = file.OpenReadStream())
		{
			uploadedFile.CopyTo(localFile);
		}
	}
	ViewBag.Message = "Files are successfully uploaded";

	// Get files from the server
	var model = new FilesViewModel();
	foreach (var item in Directory.GetFiles(Path.Combine(Directory.GetCurrentDirectory(), "upload")))
	{
		model.Files.Add(
			new FileDetails { Name = System.IO.Path.GetFileName(item), Path = item });
	}
	return View(model);
}
FileView Model:
using System.Collections.Generic;
using System;

namespace FileUploadDownload.Models
{
    public class FileDetails
    {
        public string Name { get; set; }
        public string Path { get; set; }
    }

    public class FilesViewModel
    {
        public List<FileDetails> Files { get; set; }
            = new List<FileDetails>();
    }
}
Step 5: Downloading Files
Implement the code below in the controller to enable file downloads from the server.
// Download file from the server
public async Task<IActionResult> Download(string filename)
{
	if (filename == null)
		return Content("filename is not available");

	var path = Path.Combine(Directory.GetCurrentDirectory(), "upload", filename);

	var memory = new MemoryStream();
	using (var stream = new FileStream(path, FileMode.Open))
	{
		await stream.CopyToAsync(memory);
	}
	memory.Position = 0;
	return File(memory, GetContentType(path), Path.GetFileName(path));
}
Also, include the following code inside the Index action method to retrieve files from the server upon page load.
public IActionResult Index()
{
	// Get files from the server
	var model = new FilesViewModel();
	foreach (var item in Directory.GetFiles(Path.Combine(Directory.GetCurrentDirectory(), "upload")))
	{
		model.Files.Add(
			new FileDetails { Name = System.IO.Path.GetFileName(item), Path = item });
	}
	return View(model);
}
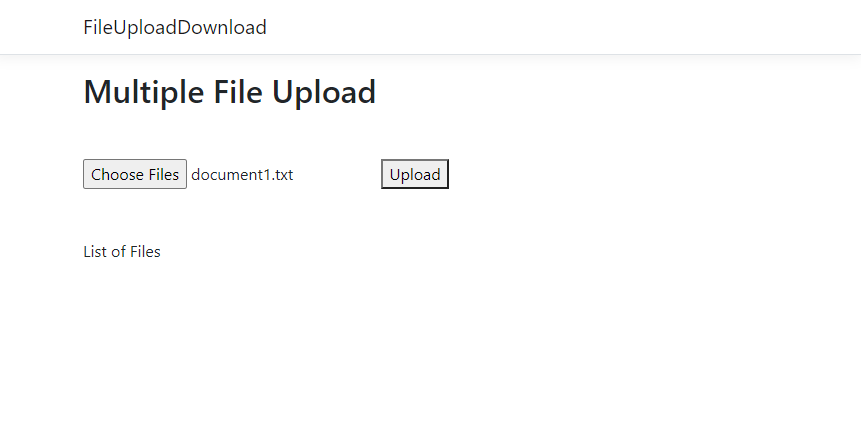
Output:
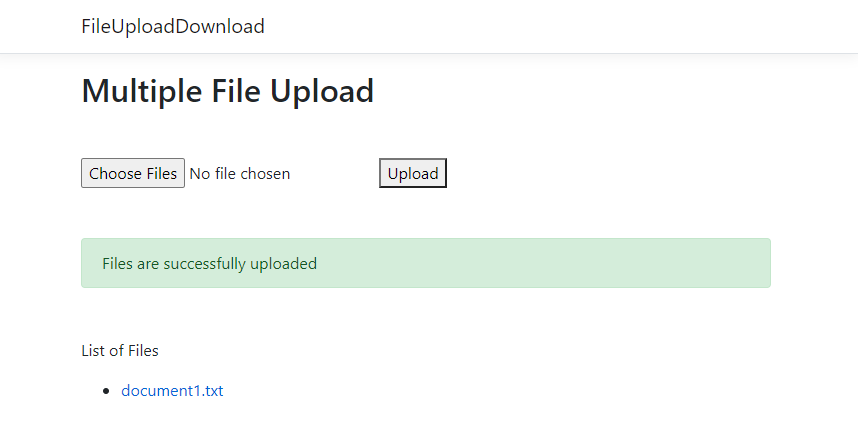
To upload a file, use the file upload control, choose a file, and press the upload button.
The file is uploaded successfully and listed on the screen.
Conclusion
Users can successfully upload and download files in an ASP.NET Core MVC application using the above steps. The integration of proper form attributes, controller actions, and view modifications ensures a seamless and user-friendly file management experience within the application.
![Bryan Siegel [Communications Unit]](https://lh3.googleusercontent.com/a/ACg8ocJEJ-LQyo6XST3psyXiZEqKwTDAGkDjXPrd5w2tNh2NLYuRSg=s96-c)

First off this code doesn't work. Where does the ViewModel come from? var model = new FilesViewModel(); If you're reading this don't waste your time. This code doesn't work.